Sponsored by:


How to Correct Vignetting with Photoshop
(Without Add-Ons)
 →
→
Major revision 2004 December 19
Introduction
Many photographs, whether film or digital, are dark in the corners.
This could be caused by true vignetting (obstruction of the optical path at the edges)
or by factors such as the cos4 law, which obliges
wide-angle lenses to spread their light more thinly at the edges than in the center.
In what follows I will call both of these effects vignetting.
There are numerous Photoshop plug-ins to correct vignetting.
There are also standalone software packages that do this.
However, in what follows I'll tell you how to correct vignetting
with Photoshop without using any add-ons.
These instructions apply to Photoshop Elements 2.0, and, with minor variations,
to Photoshop CS and several earlier versions.
Importing raw files
Photoshop CS offers the ability to adjust for vignetting when you are importing a camera raw file
(.RAW, .CRW, .NEF, etc.).
However, if you are going to do dark frame subtraction (common in astrophotography),
don't do that
unless you can make sure it's done exactly the same way to the dark frames.
I prefer to produce linear TIFFs with Canon File Viewer ("linear" option checked),
process them, and compensate for vignetting near the last step.
Working with JPEG, TIFF, or other non-raw files
(1) Open the picture in Photoshop.
(2) Choose the Gradient tool:

In some versions you will have to right-click on the paint bucket to get to it.
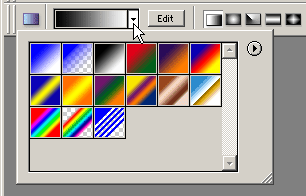
(3) Click on the Gradient Picker (shown here) and choose the black-to-white gradient (the third choice in this menu,
but yours may differ).
(4) Edit the gradient. In Photoshop elements, click on  .
In Photoshop CS, click on .
In Photoshop CS, click on  , which may have a pattern in it
other than the checkerboard shown in this example. , which may have a pattern in it
other than the checkerboard shown in this example.
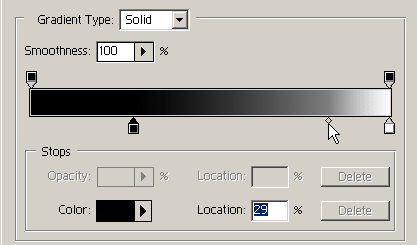
(5) Adjust the gradient to look like the gradient of the vignetting in your picture.
Remember that your gradient will run from center to corner, not from center to edge.
For instance, if your picture is essentially flat until 3/4 of the way out, and then drops
off sharply in the corners, make the black part of the gradient do the same thing.
You can adjust several sliding pointers.
Note that you are putting white where the picture is too dark.
Don't worry about the contrast of your gradient, only the way it is proportioned from
beginning (center) to end (edge).
(6) Choose the radial gradient.

(7) Set Mode to Luminosity and Opacity to something like 5% or 10% (your guess).

(8) At last, drag the mouse to draw a line from the center of the picture to the corner.
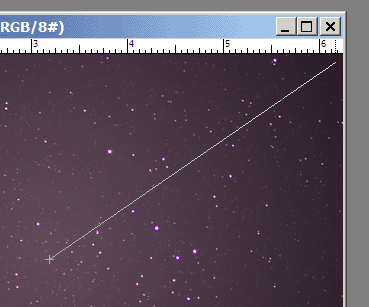
Hint: In some cases you'll get a better gradient if you draw from the center to a point outside
the picture. This is permissible, if the window is bigger than the picture.
(9) Look at the results. You'll almost certainly want to hit Undo and go back and change some
settings:
- If you have too much correction (a dark center and light edges), reduce Opacity.
- If you have too little correction (still some vignetting left), increase Opacity.
But undercorrecting is good. You'll never remove every trace of vignetting from your image.
There will be shifts in contrast and color balance; you should leave some brightness gradient
uncorrected so that these will not look unnatural.
- If you have a doughnut-shaped dark or light ring, edit the gradient to shift the proportions of
light and dark along its length.
(10) Last, adjust levels so that the picture isn't too light.
And don't be afraid to go through this cycle several times.
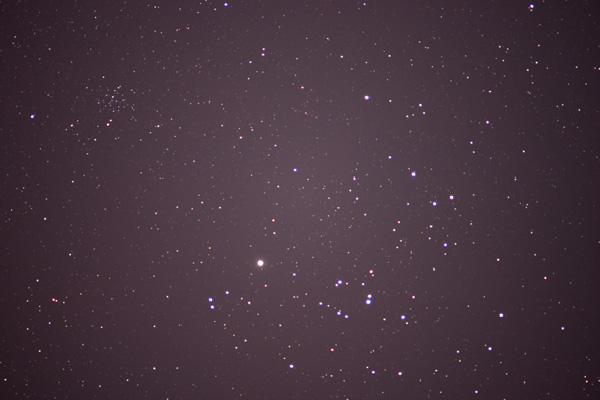
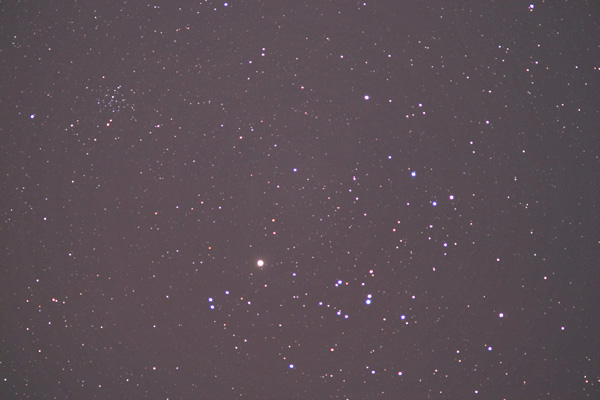
Here's an example, a picture of the Hyades star cluster:
BEFORE:

AFTER:

Copyright 2004 Michael A. Covington. Caching in search engines is explicitly permitted.
Please link to this page rather than reproducing copies of it.
This page is not in any way connected with or endorsed by any
photographic manufacturer. Many of the product names that appear
on this page are registered trademarks of their respective owners.
|

