|
|


Copyright 2004 Michael A. Covington.
Please link to this page rather than reproducing copies of it.This page is not in any way connected with or endorsed by Nikon or any other photographic manufacturer. Many of the product names that appear on this page are registered trademarks of their respective owners.
Introduction
External flash photography with the Nikon Coolpix 990 is not fully documented in the instruction manual. This page comprises my brief notes. Most of this information should apply to the Coolpix 950, 995, 4500, and other models.
Warnings and precautions
The flash circuitry in the Coolpix 990 is just not as smart as that in the N70, N90, or other recent SLRs. It works reasonably well but does not do through-the-lens matrix metering, nor does it control the auto-zoom of a Nikon dedicated flash. Indeed, its "TTL mode" actually uses a small photocell on the front of the camera, next to the lens, which apparently takes in only the center of the picture.You must watch the ready-light whenever using an external flash. The ready indicator on the camera does not respond. If the flash does not fire, the Coolpix will happily record a black frame.
When using a flash that is not Nikon dedicated, watch the trigger voltage. Some old flashes (such as the Vivitar 283) use a voltage that can damage the Coolpix.
You can measure the trigger voltage of a flash by applying a voltmeter to its terminals while it is separate from the camera, but turned on and ready. Most modern flashes use about 6 to 10 volts. The Coolpix can reportedly handle 200 volts, but some older flashes and studio systems go as high as 500 volts. Wein makes a gadget for safely connecting a high-voltage flash to a low-voltage camera.
Is it really overexposed?
Correctly exposed flash pictures often look a bit light on the LCD screen, and highlights that appear blocked (too white) on the LCD are often quite usable in the actual picture.Putting this another way: The LCD errs on the side of caution; it displays the picture with higher contrast and less dynamic range than the picture actually has.
Attaching external flash units
Recommended reading: Nikon's FAQ item about this.To attach an external flash to the Coolpix, you need either a Nikon SK-E900 flash bracket or a Nikon AS-E900 adapter. The latter is a cable that goes from the Coolpix flash connector (on the bottom of the camera body, under the lens) to a conventional Nikon-dedicated hot shoe. An AS-E900 is included with the SK-E900.
You can use any conventional hot shoe flash (with just one contact in the middle, plus the connection to the shoe itself) or any Nikon-dedicated TTL autoflash (made by Nikon or others; I use a Sunpak 4000AF).
If your flash has a cord with a small round connector ("PC type"), rather than a hot-shoe connection, you can get a suitable adapter at a camera store, or spend more money and get Nikon's AS-15.
Useful links
Nikon Coolpix 950 manualNikon SK-E900 flash bracket instructions
Nikon's FAQ item about attaching external flash
Nikon's FAQ item about external flash functionality with Coolpix
Nikon's chart of which flashes work with which Coolpixes
Coolpix external flash FAQ at donwiss.com (with many other links)
Coolpix with studio strobes (by Bahman Farzad)
Google search for "Coolpix external flash"
Nikon dedicated TTL flash
Using a Nikon dedicated TTL flash is easy. In principle, you just connect it, turn the camera on (A or M), and proceed exactly as if you were using the internal flash.The internal flash will fire along with the external one unless you turn it off. To do so, turn the camera on to M and use the menu to select
and then Speedlight Control.
Be sure to zoom the flash out to cover the field of a 28-mm lens unless you are sure a narrower angle is sufficient. The Coolpix will not control it automatically.
You can use bounce flash, reflectors such as Lumiquest, etc., in the normal manner.
In practice, however, the TTL flash control isn't nearly as good as with the N70 and similar cameras. The reason is that instead of metering through the lens, you're controlling the flash through a small photocell on the front of the camera. The result is hardly any different from conventional autoflash.
Controlling the aperture yourself
For greater control, turn the camera on to M, hold down MODE and use the thumbwheel to get to A (aperture-priority exposure mode), and then use the thumbwheel by itself to set the f-stop. A good starting point is f/4. Use lower numbers if your pictures are coming out dark, higher numbers if they are coming out light. In between is a considerable range of f-stops that give the same exposure, as the flash automatically adjusts itself.You will also find that there is a considerable distance range over which the flash works well, but things will be washed out if too close to the camera and dark if too far away. Use a wider f-stop (smaller number) at greater distances.
This is also how you control fill-in flash. The flash will always adjust itself to give a correct exposure, if it can. At wider (lower-numbered) f-stops, more of the illumination will come from ambient light (rather than the flash). At a sufficiently wide stop, the flash wouldn't need to fire at all, although in fact it cannot regulate itself all the way down to zero.
Flash functionality
Nikon says that most Coolpixes use only regular Nikon dedicated flash, i.e., TTL mode (not actually metering through the lens). Thus, a wide range of Nikon-compatible flashes will work equally well.I happen to be using a Sunpak 4000AF, which is Nikon-dedicated but lacks "3D matrix metering" and some other newer modes. This flash also works well with my Nikon N70 and as a manual flash.
(Sunpak photo)
Bounce flash
Hint: In a room with a low white ceiling, bounce the flash off the ceiling.
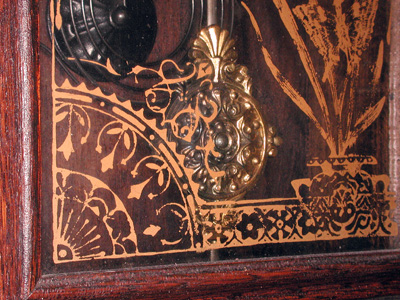
Three pictures of a Victorian-style kaleidoscope.
Sometimes bounce flash is the only way to go!
Autoflash (not Nikon dedicated)
This category includes any flash that controls its output with its own photocell rather than the one in the camera. Many elaborate dedicated flashes also have this mode, which is called "A" and selected with a switch.[So far we have encountered 3 different things called "A mode." How many are there going to be?]
The flash will have, on the back of it, a table or scale indicating what f-stop to use with each film ISO speed. The flash may have several light levels each with a different f-stop.
Procedure:
(1) Turn the Coolpix on to M.
(2) Hold down ISO and use the thumbwheel to choose 200.
(3) Hold down MODE and use the thumbwheel to choose the f-stop that your flash says to use for ISO 200 film.
Precaution: The f-stop of the camera lens will change as you zoom, so keep an eye on it. There is a menu setting to keep it from changing, in M mode only.
(4) Take pictures. You can adjust the f-stop if pictures are consistently too dark or too light.
I have used this technique very successfully with a variety of old autoflashes and with a Vivitar auto ring flash.
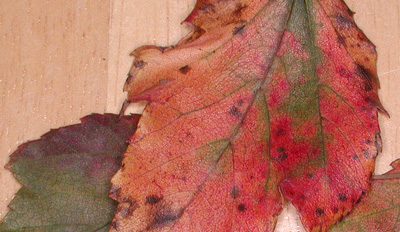
Leaves and the pendulum of an old clock.
Vivitar 5000 ring flash with Coolpix 990 in A mode, f/8.
Fully manual flash
Almost every flash offers this mode, whether or not it offers anything else. It's labeled "M" and there may be another, labeled "1/16," that is only 1/16 as bright, for close-ups that would otherwise be washed out.In this mode, the flash gives you an f-stop to use based on ISO speed and subject distance; you have to read a scale or chart.
Proceed as for autoflash, except that you have to adjust the f-stop for every picture. Since trial and error goes rather rapidly with a digital camera, this may not be as much trouble as you think.
Slave flash
The built-in flash on the Coolpix will trigger any wireless (light-activated) slave flash. Trial and error is the best way to work with a multiple-flash setup; treat it as manual even if the flashes are autoflashes.Fortunately, trial and error doesn't waste film (though it does consume batteries).
If you want to use only the slave flashes and not the one in the camera, here's a trick that reportedly works. Cover the built-in flash with a black piece of color film (either unexposed slide film or overexposed print film). This must be color film, not black-and-white, so that it will transmit infrared. The infrared pulse that goes through it will trigger the slave flash even though there isn't enough visible light to illuminate the subject.
Ring flash and ring light
A conventional ring flash can be treated as a manual flash or autoflash as described above. I have had good results doing this, except that my Vivitar ring flash is only usable at distances beyond about 18 inches - otherwise it's too bright. It gives very even, regulated light and is good for illustration work.A Nikon dedicated ring flash does not work in TTL mode because it blocks the photocell on the front of the camera which controls the dedicated flash!
Nikon's SL-1 LED macro light is, in my experience, not bright enough to be useful unless the camera is mounted on a tripod. Samigon's fluorescent ring light may be better.
With any ordinary ring flash, you will need step-up rings to go from 28 mm (Coolpix) to a size that the ring flash actually fits, such as 52 mm (typical Nikon SLR lens).
Important camera controls
You probably know these, but they are listed here for reference, and to define terms.Camera modes
There are two camera modes, A and M, chosen with the on-off switch. They are also called A-REC and M-REC.A is highly automated; M gives you more manual control (mostly through the menu system).
Exposure modes
In camera mode M, you get to choose from four exposure modes by holding down MODE and turning the thumbwheel. They are:In camera mode A, the exposure mode is always P.
P (program mode) Camera chooses both shutter speed and aperture (f-stop). S (shutter-priority auto) You choose shutter speed with thumbwheel; camera chooses aperture. A (aperture-priority auto) You choose aperture (f-stop); camera chooses shutter speed (which is always 1/60 if the flash is going to fire). M (manual) You choose both shutter speed and aperture (f-stop); camera displays an exposure meter.
Press MODE to switch whether the thumbwheel changes the shutter speed or the aperture.Flash modes
These are selected with the button below the center of the screen.
AUTO Flash fires if needed. Flash never fires. Red-eye reduction (white light shines from camera to make people's pupils constrict before flash fires). SLOW Flash fires if needed, but shutter speed can be longer than 1/60. Useful for mixing flash with room light in large interiors. Flash always fires. Internal flash off, external flash on. This is available only in camera mode M and only from the menu (under